Hey hey! Sorry for the lateness of this post. Lou and I are planning her (4th!) birthday party, and somebody keeps changing the theme. We spent more time at the party store than I anticipated, is what I'm saying. But I am pretty stoked about today's post: Meet Dusty, my new bff.

DIY Chalkboard Command Center & Activity Zone
Of note: I hate the term "command center," but I'm a slave to Google algorithms just like everybody else, so I'm using it here. (That's also why I excessively use the term DIY even where I might just describe something as a project in conversation, btw - it's all about the SEO, y'all). Now that that's out of the way, let me introduce you to a new zone in our kitchen that is incredibly useful and takes up no space a'tall. I've been threatening to paint some or all of my walls black for some time, but the dream started with this wall. I wanted to make it a place where I could jot notes and info, keep a calendar, and let Lou create while we're cooking. Though the imperative for a kitchen-based kid activity center isn't as great now that I have a much coveted open floor plan, I still think that a place for kids to draw and create in the kitchen is an amazing way save sanity.
So here it is! The process, super fast:

Step 1: Magnetic primer
Step 3: Cure the chalkboard paint by running a piece of chalk, length-wise over the whole thing.

Step 2: Black chalkboard paint
To maximize utility, I started with three or so coats of magnetic primer. I used Rustoleum, and I'm not a huge fan. I've used it before, too, and it's just not super strong, magnetically speaking. I recommend getting the paint stirred at the store and using it ASAP; then keep stirring throughout your process. It's tough to keep the magnetic bits mixed with the paint, which makes for a weaker magnet. We tried, and still ended up with a pretty weak magnetic surface, but it does hold strong magnets alright - as long as you don't ask them to hold much else up, with them. Next up, we painted two coats of black chalkboard paint, also Rustoleum.I had also bought a quart of Benjamin Moore's brand, but the guy at the hardware store recommended Rustoleum over it, so I used it first. I thought the magnetic primer was a nice dark color, but I really loved the inkier chalkboard color. Then we suffered through a THREE DAY curing period before further prepping by running a piece of chalk, sideways, over the whole thing.

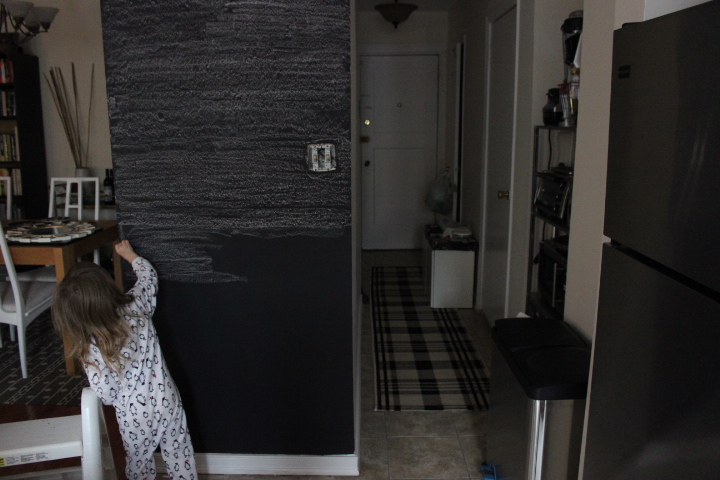
What's wrong with this picture?
Then, I painstakingly hand drew a calendar onto the wall. Then, someone (Lou, me, who can remember?) realized that there are seven, not five, days in the week, so we erased that calendar and started over.

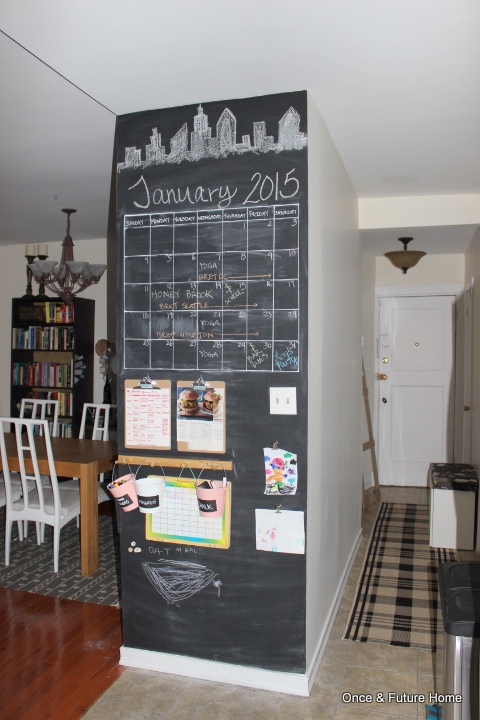
DIY Chalkboard calendar
This calendar isn't super comprehensive, but it captures info the whole family wouldn't suffer to remember/be reminded of. I have a birthday/anniversary calendar I think I'll hang up below it, too, as there's a nice little space for it. I just have to find it. I used chalkboard pen to make the structure semi-permanent, and regular chalk for the dates and info. It turns out chalkboard paint doesn't erase super well with a dry eraser, though, so I'll probably just have to carefully wipe out the insides of the grid come February. Whatever.

Next up, the menu zone. Here's a sneak peak of a new meal planning and grocery shopping system that's so far working awesomely for us - more on that soon. Here, clipboards hold a dry-erase menu and shopping list, and any recipes I'll be using that week. Easy, peasy, lemon squeezey. And if I need to jot down more shopping items, there's chalkboard space for that.

Easy kid chalkboard wall zone.

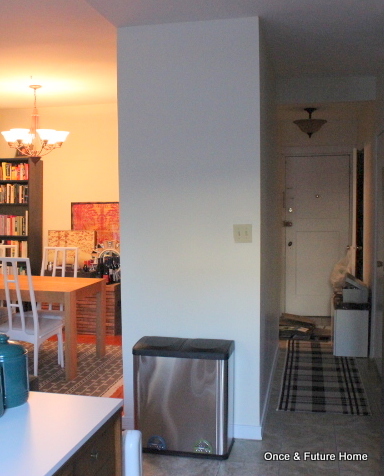
Finally, there's the Lou zone. This part's pretty important, and was, like the rest of it, super simple. I hung Lou's responsibility chart (which is more for show than anything, at this point), chalk, dry erase markers and magnets on a cheap coat rack within her reach. I use the chalk and makers, too, but this way we both can access everything. A couple magnet clips hold some art pieces, and voila - a DIY chalkboard command center with menu planning zone and kid's activity center, all in one. I heart, and I recommend. If it's not overkill, here's a before-and-after for 'ya:
Love it. Thanks for reading, and we'll see you tomorrow.