Dresser into Kitchen Island Makeover
It's Thursday, so let's do a Make {Stuff} Better post! Today's project: turning a thrifted dresser into useable kitchen storage using no tools other than an iron. So yeah, I guess the title is a wee bit misleading, but do you normally think of "clothes iron" when you think of tools? I didn't think so.
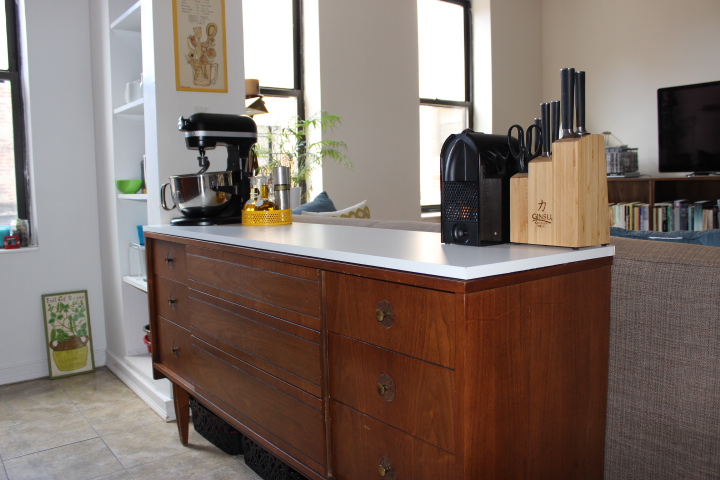
Anyway, a while back - more than a year ago, now - I spotted this dresser at Goodwill for $30.

It wasn't without its problems, including a pretty scarred top, but I loved its mid-century amazingness. I snapped it up and we've been storing it ever since. The dresser came with an attached full sized mirror, which would look cool in a bedroom. But as soon as we decided to move into this place, I knew I was going to repurpose this favorite dresser as some much needed kitchen storage and counter space.

We removed the mirror and hardware, but because we backed this dresser up to the couch in the living area (you can see a floor plan here), the back is concealed, so we didn't need to resurface it at all. All I decided to do was top the dresser with a solid surface that would a) hide the scratched surface of the dresser, b) add a little bit of height to the dresser, and c) make the dresser look more at home in the kitchen.
We looked at having a piece of counter top custom cut at Ikea, but at over $100 for all of them (and sometimes much more than that) it ended up being way too pricey for this project. We may want to return this dresser to a bedroom some day, so we weren't looking to spend lots of cash. Once the counter tops were ruled out, we settled on buyig piece of melamine from the hardware store. We got a piece of 2' x 8' melamine for about $25 from Home Depot. The best part? They cut to size there. They took this down to our measurements (64" x 18") for free. For the win. As soon as we laid it on top of the dresser, we were sold. The smooth white surface is lovely and bright, and it really brings this dresser kitchen side. But the edges where the board had been cut were now rough and unfinished.

No prob, bob. That's what they make melamine edging for. This stuff.

That's my rolling pin, which I included in this photo because the directions said to use a wooden roller to smooth out the finishing tape. I know they didn't have a rolling pin in mind, but I figured it would work just as well. It may have, but I didn't end up needing it in any event. I just used my iron to iron the tape onto the edges, trimmed away the excess, and called the project a success.

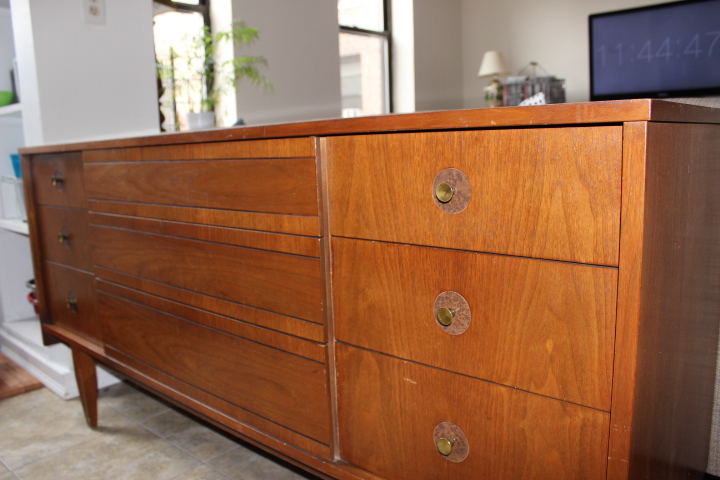
I had one more thing to do before I called this dresser island worthy. We've had the melamine top on for a week or so, and though it's heavy enough to stay mostly stationary, it did move about a bit with use. To fix this without permanently binding the melamine to the dresser, I went the lowest-tech route possible. I cut a strip of carpet padding and sandwiched it between the dresser top and melamine.

I deliberately cut the carpet padding a couple inches short all around so that you wouldn't be able to see it at the edges. There is a tiny gap now between the dresser and the top. It's really apparent in the photo below, but you have to be looking at it from exactly that angle to notice. Though I'd prefer them to be totally flush, I'm happy enough with how firmly the melamine stays in place to keep it as-is for now. I might try a similar tactic with something even thinner though, like drawer liner. If I do, I'll let you know.

And...that's it! If you need extra kitchen storage, consider a dresser over a pricey kitchen island. There are lots of examples of people converting dressers into islands and the like - you need only do a quick Pinterest search for more ideas. For a temporary solution, I thought we didn't need to get too complicated. We opted not to raise the dresser to counter height because we wanted to preserve its legs and integrity, but people do often do that. We didn't add a permanent counter for the same reason, but our is nice and sturdy for now. All in all, this is a quick, renter-friendly project that rang in at $60, total, for all the materials. Not too shabby, when you consider even small kitchen islands at Ikea cost more than that.
Thanks as always for reading and we'll see ya tomorrow!