DIY Charging Station
Top o' the morning to you. Do you remember last week when I showed the mess of cords that adorned my bedroom floor? This one?

Blech. Although the device cord situation is pretty bad in this house because there is one outlet per room (not exaggerating!), it's been like this for a while. Same pile of cords plugged into sexy power strip at our last place. If I thought you cared, I'd dig up a picture of the cord pile I took in our last place in preparation for remedying the problem. Which never happened. But here we are in 2015, which, in addition to being the year of Learning Stuff, let's also call the year of Getting Things Done. So this weekend, I finally got to it.
Desk Organizer and Craft Paper into DIY Charging Station
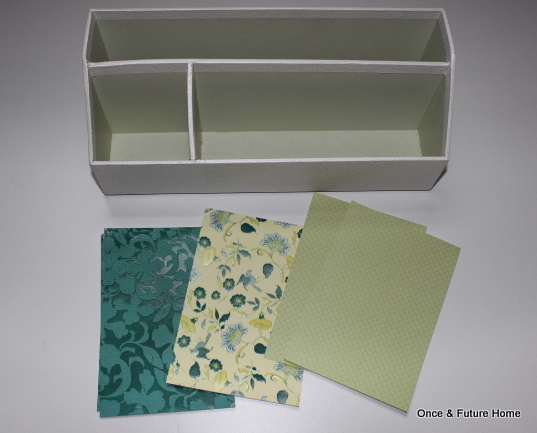
I picked up this desk organizer at Goodwill months ago. It's from Martha Stewart's Staples line originally. I paid a couple bucks for it. Similar items - that is, cardboard desk organizers - are pretty easy to find. Target has a bunch. Presumably, so does everywhere else. I could have left the inside alone, but that seemed unnecessarily simple, so I picked out a couple pieces of craft paper from my stash to line the back of each compartment with regular old glue.
Step 1: Figure out where each device will go. We have two iPads (cause Santa brought me a mini of my very own!!!) and two phones, so I stuck everything in there first to see where I should place the cords. Yes, I took Bret and Lou's chess game out of their hot little hands, but only for a minute. You may only count one iPad here - we actually hadn't picked mine up yet...which accounts for a placement switcheroo you'll see at the end.

Once I had the devices and paper where I wanted them, it was cord time. I used an Xacto knife to cut a cross shape for each cord. This was the easiest way for me to get the cords through without risking them slipping right back out again. It was a minimal pain in the rear - especially the inside compartments - and the end result is beautiful:

As is the bird's eye view, but the good news is, that's highly irrelevant; no one can see the mess.
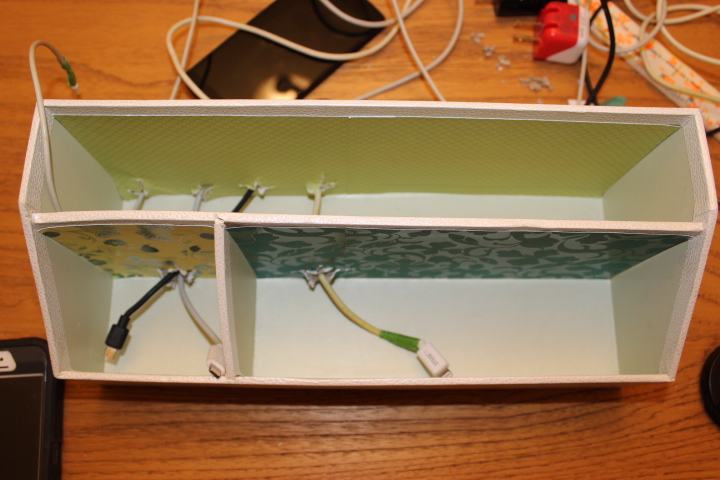
There is one step here that I didn't show (sorry) - I cut two little blocks of Styrofoam and wedged them at each end of the back compartment for the iPad to rest on. That way, the iPad rests evenly, instead of resting wonkily with one end on the wires.

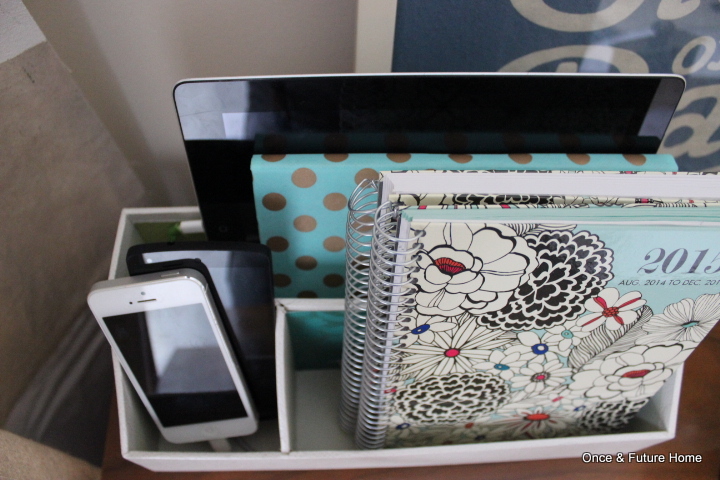
This is how I set it up at first, but I had thought the mini iPad would be able to fit horizontally. Instead, because the charger is so long, it had to sit vertically and rest on its charger. I didn't like that, so I moved it to the back, nestling it in front of Bret's bigger, manlier iPad.
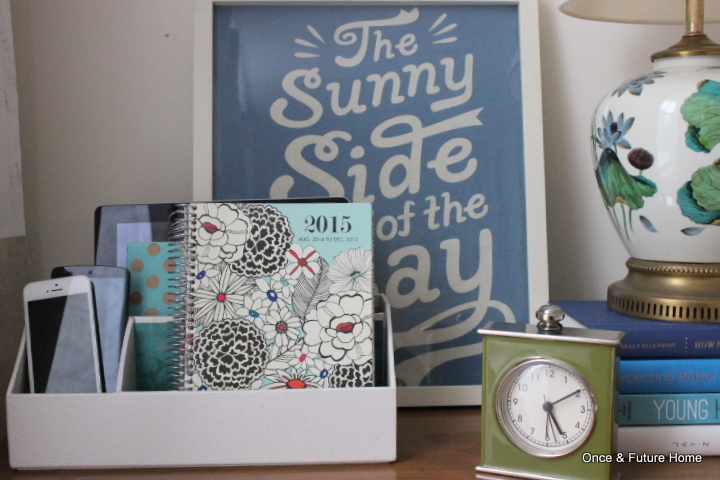
There it is, in its adorable cover that Bret, er Santa, whoever, picked out. I mean, he deserves a lot of props for picking out an iPad cover that coordinates with our room decor, amirite? You can see that the phones are sill resting on their chargers, but they're light and it doesn't bother me as much. Moving the mini IPad to the back compartment leaves room in the first compartment for my day planner and journal (Paper Source), which I really like because I tend to do a lot of planning in bed at night, and now they have a dedicated place! I don't know if that would warrant an exclamation point in anyone else's world, but I'm pretty psyched about it.
So for two bucks, I have some gosh darn order around here. I was so excited about the end result that I made Bret stop what he was doing to "Come see what I did!" He was very polite about it. "Oh, they're all charging at the same time. Great, babe. Are you done with my phone?" But I think you can agree that this is a vast, vast improvement. Sure, I could have bought a charging station, but they are expensive and, I think, ugly. Are you upgrading anything into something useful? Making any headway during January's requisite organization drives? Do tell!