Upgraded DIY Kitchen Island
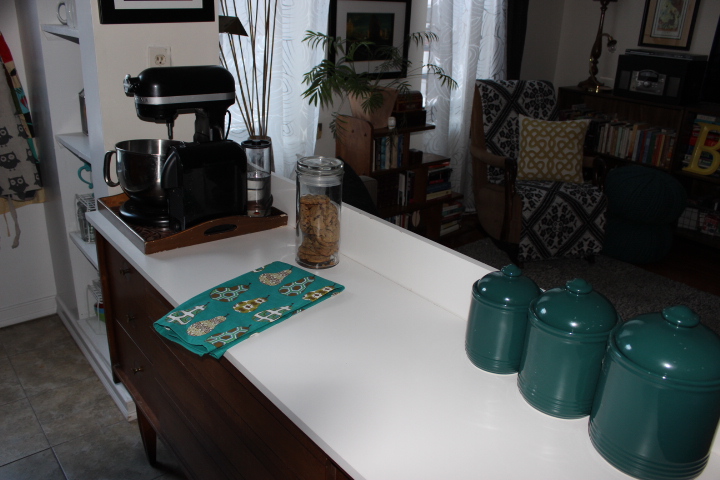
There she is. I talked about how I made this dresser kitchen-worthy with one super easy addition: a piece of cut-to-size melamine from Home Depot for about $25 bucks. We love the thing; I am so crazy about this dresser that my only regret is that it doesn't truly get to shine tucked into this little galley kitchen alcove. Well, not my only regret. You can kind of see it here, but we put this dresser here to delineate the kitchen space from the family room, and then we backed the couch up to it.
Kitchen island from dresser
So that brown strip beyond the white countertop? That's my couch. That little grease stain on the top? That's from fried onions last week. Since we actually started cooking here again, some sort of delineation has been necessary. When I bake, I spread a towel over the back of the couch to protect against flour, but I don't do that all the time - hence the fried onion incident - and I'm always a little worried that those canisters of sugar and coffee are going to go over the edge and then I'll have a real clean up issue. My vacuum cleaner's not so hot (until I get a Roomba???).
So, I started to think about complicated solutions. I like the fact that I can see the family room while I'm cooking; what a difference that makes with kids and company. The open floor plan: I finally get it. So my mind wandered over to a metal grate of some sort. There's existing hardware and poles to attach a heavy mirror to this dresser, and I was thinking I could maybe get something like one of these, and connect it the same way you'd connect the mirror.
Do you see how something like that, attached to the back of the dresser, if it were low enough and secure enough, could be cool? You could even use S hooks to hang spoons and stuff from it, which would be cute and functional. I'm not sure it would actually protect against flying flour though. Which was the goal. And the decorative metal grates I found were a bit pricey. I kept thinking, and considered that normal counters often have a small lip of back splash to protect the wall. Well, I did have spare melamine from the original counter top. And it was already cut to the perfect length of my counter. So...here's a bunch of crappy, after-bedtime, in-the-dark photos for ya. I thought I had taken more photos, but I suppose between actually doing the work and dropping the whole thing on my foot (only once!), I wasn't as shutter happy as I thought. The main gist is that I wanted to connect the short white piece of melamine to the counter portion, but I didn't want to just screw it in and have a bunch of ugly screws visible from the back. If this had been backed against a wall, I would have gone for it, but since the lip - let's call it a back splash - would be visible from the family room, I decided to employ my astounding carpentry skills to use hidden wooden pegs instead.
I set up a workshop on my dining chairs, which, thankfully, I still had not attached the recovered seat bottoms to, so they were a really handy platform. I selected a bunch of wooden pegs, which I've collected over years of improperly constructing flat pack furniture, and chose a drill bit I thought was the same size. Then I lined up the two pieces and marked where I would drill corresponding holes at the exact same place on each piece. Then, to firmly connect the two pieces, I slathered Wood Weld, an epoxy, all over the pegs and in the holes and then fitted the two pieces together.
And that's what I ended up with! Not too shabby, if I do say so myself. I even watched a couple episodes of Revolution at the same time, because that's how much attention you need to devote to that show without losing out on any nuance whatsoever. But alas, my carpentry skills aren't that awesome. The pegs I used ended up being a bit smaller than my drilled holes, so the fit between the pieces just wasn't as snug as I wanted. So, after all that, I reached for my drill yet again and went ahead and used two screws, one on each end of the counter, to firmly tighten everything up.
There's one. It's not super pretty. It's also not super noticeable, but I'm still glad I didn't do a whole row of ugly silver screws down the back of the back splash. That would have been more noticeable, I'm sure. From the front, here's the end result:
Better. A lot better, actually. Now my poor couch is protected from our cooking, and I don't think it looks bad, either. There's also an unplanned for little bonus. I didn't shave (or rather, have Home Depot shave) the counter top down to accommodate the extra width of the back splash, so the counter now sticks out a bit over the edge of the dresser.
It's just a bit, but having that little lip makes for a much easier time cleaning counters and even scraping ingredients onto cutting boards and the like. It doesn't look at all unnatural, either. So overall, I'm pretty pleased with this little upgrade. Though I still love the idea of a decorative metal grate acting as something of a room divider/utensil holder, for now, this is where we're staying. Have you guys ever done anything like this? Are any real carpenters out there reading this and laughing their bums off? Hope your Wednesday is great. Catch us back here tomorrow!


